Jose Agustin Andreu
STUDENTS' WORK
2 Dimensional Design
Values
Text
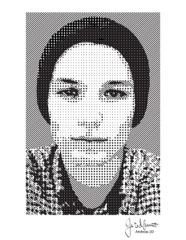
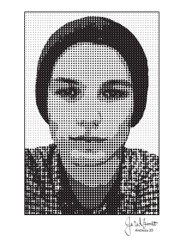
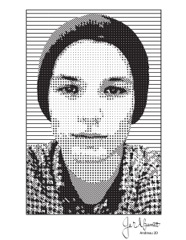
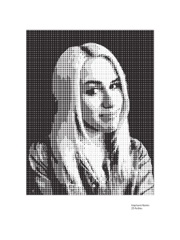
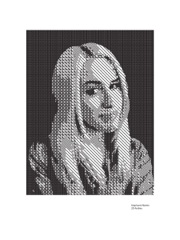
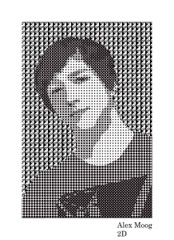
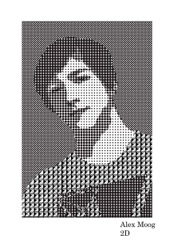
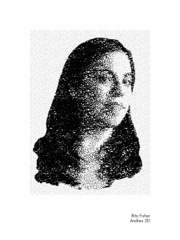
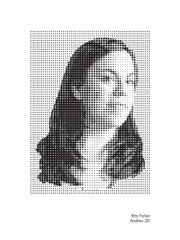
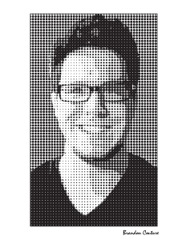
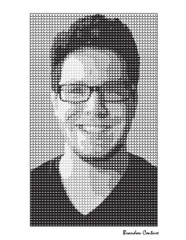
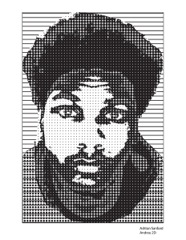
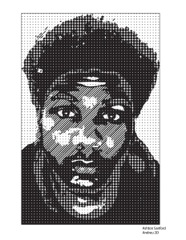
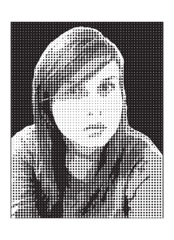
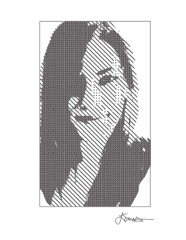
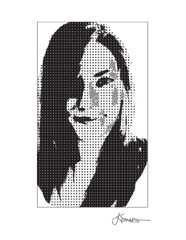
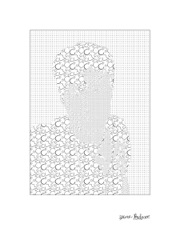
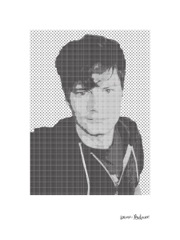
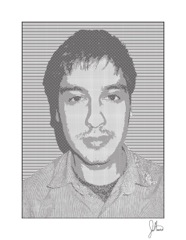
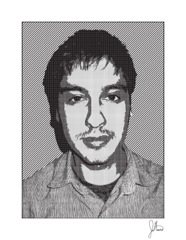
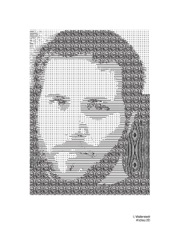
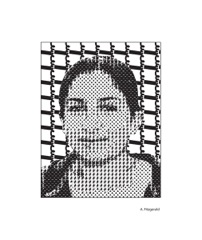
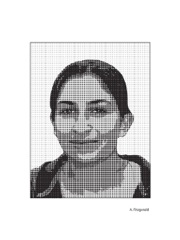
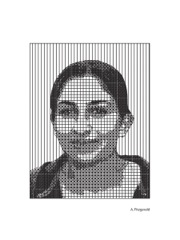
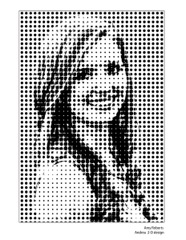
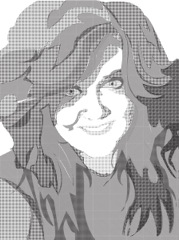
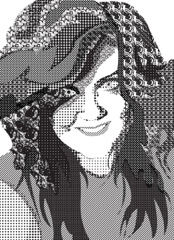
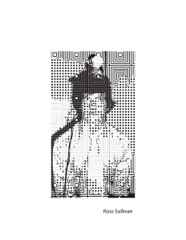
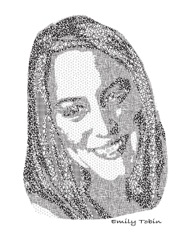
Self Portrait Value
Click Image for Manual Slides
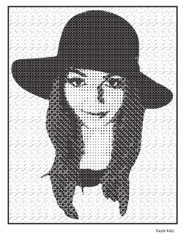
f13Kayla3
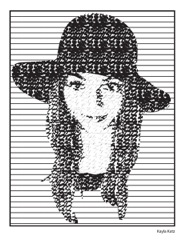
f13Kayla2
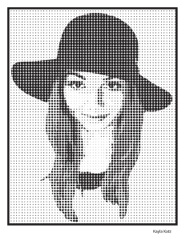
f13Kayla1
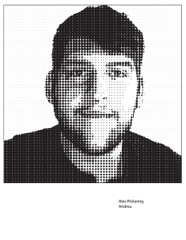
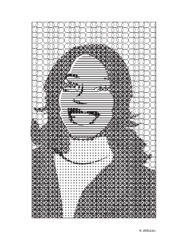
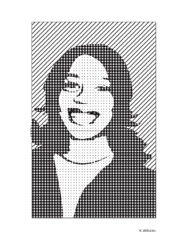
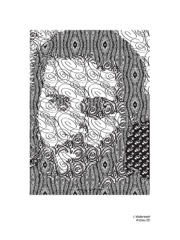
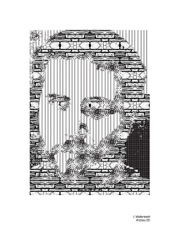
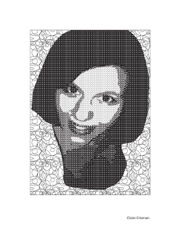
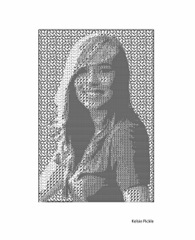
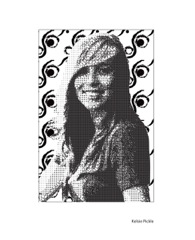
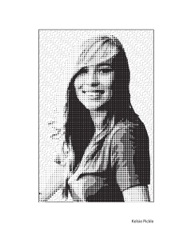
Trace a photograph of self into large and general shapes that keep the representational contours of the face. You can divide the value pattern of the photograph into three values, light, dark, and medium grey. Fill the shapes representing one value with a corresponding value pattern. Fill the other value shapes with another lighter or darker pattern. Follow the value relationships; light is light, dark is dark, etc. The rest of the image can be rounded out and detailed with linear patterns.
Make three self-portraits by filling the value shapes with the value scale swatches from the value scale exercise and the tessellation swatches from the tessellation exercise. You can also use the vectorized Texture exercises by selecting an area and making a swatch. Different textures will give you different values due to their different densities. You can also change the scale of the texture to alter the apparent value. Recreate the volumes in your image with the swatches. The recreated image should be recognizable as your self as much as possible.
To Crop a Photo on Illustrator
Open a New document on Illustrator.
Give it a name such as 'lastnameportrait1'.
Chose vertical letter format and RGB.
Go to File > Place and place the image of self on the document. Deselect.
Chose the Rectangle Tool and make Stroke black and Fill none.
Draw a frame around the part of the image to be used.
Use the Free Transform Tool to adjust the frame proportions.
Drag Select both the image and the frame rectangle.
Go to Object > Clipping Mask > Make.
With the cropped image still selected, go to Object > Rasterize.
On the Rasterize Options Window set the Resolution to High, 300 ppi, and Click OK.
Go to File > Save and save a copy of your cropped image.
Duplicate the image
Make a new Layer to work in by clicking the Create New Layer at the bottom of the layers palette. It should appear at the top of the Layers palette.
Drag Select the image. Notice that a small color square appears next to the Layer Name in the Layers Palette when it is selected. It will also show up if it's in a group.
Click and, while holding the Option key, drag the little color square to the new layer. Wait till the arrow appears on the left before releasing and it will stay with a new color.
You now have a copy of the image in a new Layer. Click and dragging is a convenient way of moving objects between layers and groups.
Or
You can select the layer by clicking on the layer name and go to the Layers Option by clicking and holding the little black arrow at the upper right of the Layers palette and selecting Duplicate Layer. Double click on the new layer name to rename the layer.
Go back to the layer with the original image
and click on the empty square to the left of the layer name to lock the layer.
Click the Eye on/off next to the layer to temporarily hide or reveal the objects on that layer.
Now you can Live Trace or trace by hand the copy of the image.
To Live Trace
Drag Select the duplicate image
or click on the Radial Button on its layer in the Layers Palette.
On the Control Palette select the Tracing Options Dialogue
or Go to Object > Live Trace > Tracing Options.
Chose the preset grayscale with 6 colors.
Or select Tracing Options in the Control menu.
In the Tracing Options window under Adjustments and Mode chose Greyscale.
In the Max Colors chose a number between 3 to 6.
Select Preview and you can experiment with the various Thresholds and Adjustments.
Try other results by changing the Max Colors to 4, 2 or 5.
When satisfied with the results, click Trace.
Convert the tracing object into vector paths by clicking Expand.
Go to File > Save and save a copy of your vectorized image.
To simplify the areas of the drawing you can try these different methods.
Join paths to make more general shapes. Make several simpler shapes rather than a very large complex shape with branches. Closed shapes work, open shapes don't.
Direct Select fill shapes and paths to delete, transform them.
Remember that Stroke Paths and Fills have to be selected so that they can be edited with the Knife Tool and the Eraser Tool.
Direct Select points and join them by going to Object > Path > Join.
Direct Select a path to cut it with the Scissors Tool.
Also, you can Drag Select the portrait and go to Object > Path > Simplify.
In the Simplify dialogue window you can adjust the Curve Precision, the Angle Threshold and select to render in Straight Lines or to see the Original for comparison.
Also with everything selected go to Window > Pathfinder and
in the Pathfinder Palette select Trim or go to Effect > Pathfinder > Trim.
Adding value patterns
Make a third Layer to work in by clicking the Create New Layer at the bottom of the layers palette. It should appear at the top of the Layers palette.
Select the layer with the vector drawing or vectorized image.
Select the entire image and go to Object > Ungroup.
Direct Select a shape or vector path representing the darkest value to be substituted with a pattern.
Notice that a small color square appears next to its Layer Name in the Layers Palette when it is selected. It will also show up if it's in a group and next to its path name.
Click and Option drag the little color square to the new layer. Wait till the arrow appears on the left before releasing and it will stay with a new color. Click and Option dragging the little color square is a convenient way of copying objects between layers and groups.
Direct Select and Option drag all the related shapes into the new upper layer.
Hold the Shift key to add to the selections and move more than one path at a time.
Repeat the procedure for each of the values represented in the image. Place copies of all the fills and vector paths representing a value in their own layer.
A quick way of moving all the similar value shapes at the same time is to Direct Select a fill of a specific value and while still selected go to Select > Same > Fill Color and it will select all the fills in the vectorized image that are the same value. While holding the Option key drag the little color square in the layers palette up to a New Layer to copy the value shapes.
Repeat the procedure for each of the values placing all shapes of the same value in their own layer.
Once you have every fill and vector path of a value in one layer there should be
a corresponding number of layers to the number of values.
Click the Eye on/off to toggle the view of the image layer to adjust the drawing layers.
Turn off the view of the lower vector layer and turn on the view of the bottom image layer.
Select an upper layer and use the Direct Selection tool to adjust the shapes to the image.
Select the Radial button in one of the value layers of the portrait.
Select one of your swatches as a new pattern fill. Fill the shapes representing one value with a corresponding value of pattern. Fill the other value shapes with another lighter or darker pattern. The rest of the image can be rounded out and detailed with linear patterns.
Make three self-portraits by filling the value shapes with the value scale swatches from the value scale exercise and the tessellation swatches from the tessellation exercise. You can also use the vectorized Texture exercises by selecting an area of the vectorized texture drawings and making a swatch. Different textures will give you different values due to their different densities. Recreate the volumes in your image with the swatches. Try to get an accurate rendition of your image by changing the density of the pattern fills. Once you reach a satisfying resolution of the image, Save.
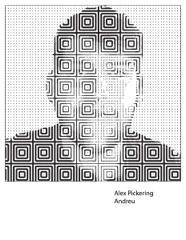
f13Pickering3
f13Pickering1
f13Lozano3
f13Lozano2
f13Lozano1
f13Bennett3
f13Bennett2
f13bennett1
f13martin2
f13martin
f13Moog3

f13Moog2
f13Moog1
f13FISHER2
f13FISHER1
f13Couture3
f13Couture2
f13Ashton2
f13Ashton1
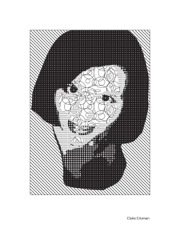
f12collins1
f11smith3
f11smith2

f11smith1
f11roderick3
f11roderick2
f11massanisso3

f11massanisso2
f11massanisso1
u11Williams3
u11Williams1
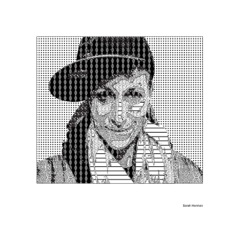
u11wallerstedt3
u11wallerstedt2
u11wallerstedt1
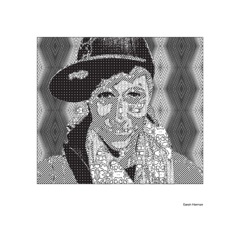
u11Herman3
u11Herman2

u11Herman1
u11Crisman3

u11Crisman2
u11Crisman1
s11pickle3
s11pickle2
s11pickle1
s11bfitzgerald3
s11bfitzgerald2
s11bfitzgerald1
F10roberts
F10gingerich
F10gingerich2
F10Sullivan
F10Tobin3
Values Text