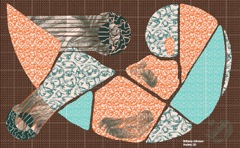
Jose Agustin Andreu
STUDENTS' WORK
2 Dimensional Design
Page 2
Golden Mean
Complementary
Click Image for Manual Slides
Go to File > Place and find the Complementary Palette template. Place it into the new document. If necessary, Embed it.
Lock the layer with the imported Complementary template by clicking on the empty box next to the eye on its layer.
Make a new layer by clicking on the Create a New Layer icon at the bottom of the Layers window. Make sure the new empty layer is above the layer with the template.
Using the template as a guide, fill all the rectangles with the appropriate Complementary color harmony.
Open the Swatches window and open its Options window by clicking on its upper right corner.
Click on the Open Swatch Libraries then click on Scientific then on Complementary. That library set will open in a new swatch window. There should be six folders with two complementary colors in each. Chose a warm color in a folder as a fill, with None as stroke, and draw a rectangle over the Warm Pure Hue rectangle. Deselect and Select the other color in the same set as a fill, with None as stroke, and draw a rectangle over the Cool Pure Hue rectangle. Deselect.
Double click on the Blend tool. In Blend Options set spacing to Specified Steps and then to 7. Click OK. With the cursor icon changed to the blend icon, click first on the Cool Pure Hue and then on Warm Pure Hue. With the blend group still selected go to Object > Expand. Then, while the group is still selected, go to Object > Ungroup. If necessary, Direct Select each of the fill objects and place them in their appropriate scale slots. Use the scale tool or click on the Selection tool to use the handles with the Shift key to scale the shape up or down for a better fit. Deselect.
Select black as a fill with None as stroke and draw black squares over the bottom five squares. Deselect.
Select white as fill and None as stroke and draw white squares over the top five squares. Deselect.
Double click on the Blend tool. In Blend Options set Specified Steps to 3. Click OK.
With the Blend tool click first on a color and then on its corresponding white square. With the blend group still selected go to Object > Expand. Then, while the group is still selected, go to Object > Ungroup.
Repeat the procedure for each of the columns. If necessary, Direct Select each of the fill objects and place them in their appropriate scale slots. Deselect.
With the Blend tool click first on a color and then on its corresponding black square. With the blend group still selected go to Object > Expand. Then, while the group is still selected, go to Object > Ungroup.
Repeat the procedure for each of the columns. If necessary, Direct Select each of the fill objects and place them in their appropriate scale slots. Deselect.
After the making of each blend remember to Expand and to Ungroup. That way you can use each swatch independent from the others. Also, remember to Deselect.
Once the Complementary palette is filled go to the bottom of the Swatches window and click on the New Color Group icon. In the New Color Group window type a descriptive name. That will put a new Color Group folder in the swatches window.
Click in the upper right corner of the Swatches window and open the swatches window options.
Select Add Used Colors. This will add the colors in the open document to the swatches window.
Shift Select all the newly added colors and drag them into the new folder.
Repeat the procedure with two new complementary hues and create a new complementary harmony.
Put each Complementary color set in its own folder.
Save your color swatches by clicking the swatches window options and selecting Save Swatch Library as AI.
Make sure you save it to you're desktop and later to your flash drive.
Open a Golden Mean project and go to File > Save As to give it another name.
Open your Complementary swatches file by going to the swatches window options and selecting Open Swatch Library then Other Library and find your saved Complementary swatches file. Use it to color your Golden Mean design.
You can use it as fills, strokes, gradients, and transparencies and in patterns and textures.
Page 1 Page 2

