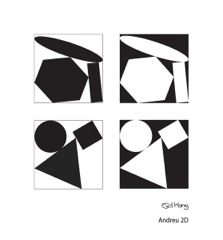
Jose Agustin Andreu
STUDENTS' WORK
2 Dimensional Design
Shapes
Images
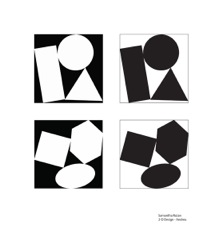
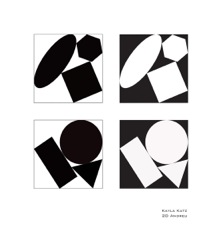
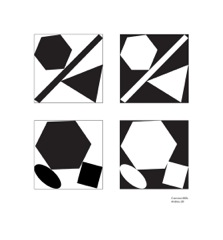
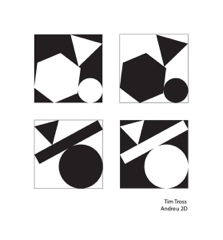
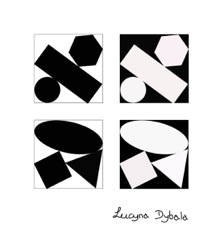
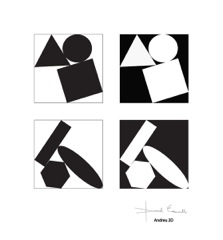
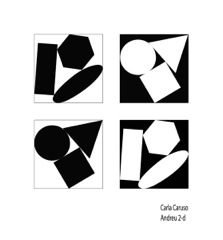
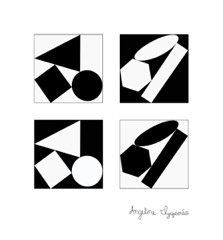
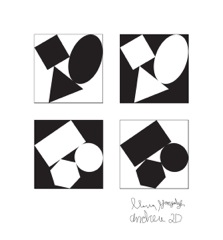
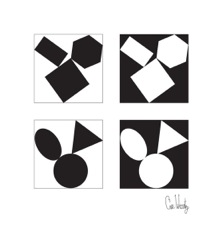
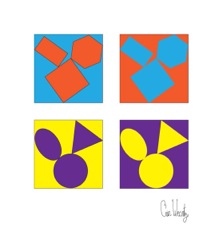
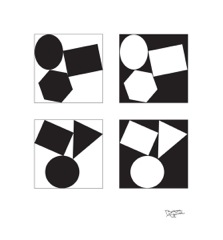
Positive Negative Shapes
Click Image for Manual Slides
f13Rutan
f13Katz
f13cranston
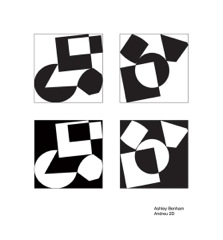
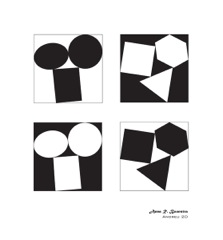
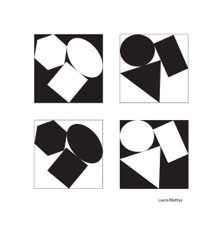
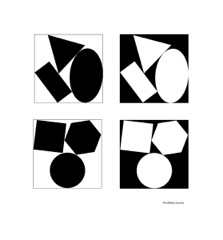
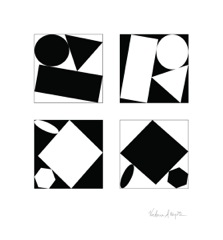
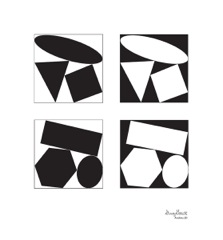
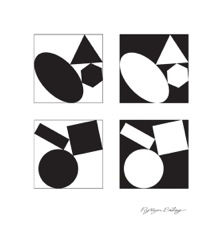
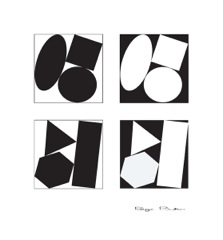
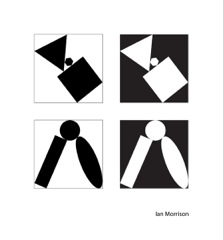
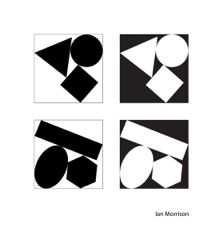
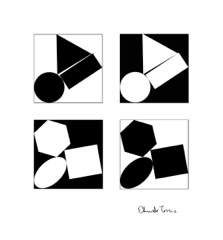
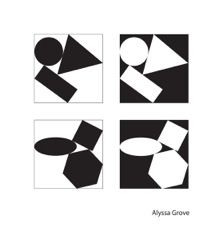
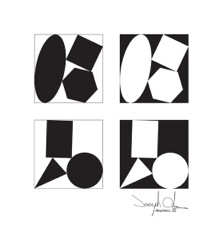
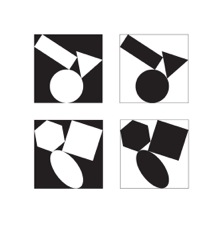
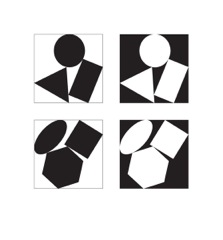
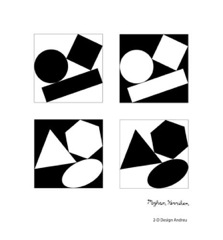
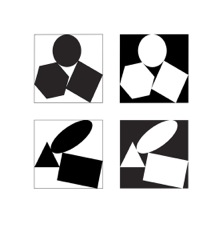
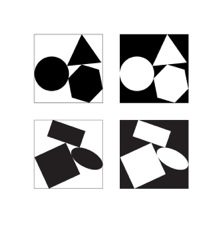
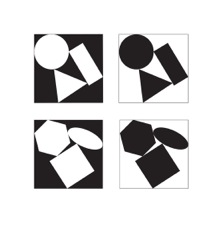
Make two designs in a square format with six geometric shapes, three in each square. The designs will balance positive and negative space so that shapes are perceived as on the same plane and in tension. The Figure/Ground relationship will appear reversible. By balancing the dominance of the positive and negative spaces, an ambivalent spatial tension is created in which neither figure nor ground is dominant making for a unified picture plane. One set of two will be black shapes on a white ground and the other will be white shapes on a black ground. Both sets are to be visually ambivalent and all four will be mounted on one panel.
go to File > Open and select '"lastnameposneg" and click Open if you don't have the document already open.
With the document open go to the Toolbox and select the Hand Tool.
Click and drag the Artboard with the 4" x 4" formats to the side so you can work outside the Artboard.
Go to View and deselect Snap To Grid.
To draw the shapes first make sure the Fill and Stroke indicators in the Toolbox are both black.
Draw six black shapes, a square, triangle, circle, oval, rectangle, and a hexagon.
All should be around 1.5" to 2" wide.
Square: Rectangle Tool while pressing the Shift key
Rectangle: Rectangle Tool
Circle: Ellipse Tool while pressing the Shift key
Oval: Ellipse Tool
Hexagon: Polygon Tool use the up/down arrows to add or subtract sides to the polygon without releasing the mouse. When it has six sides and the appropriate size, release the mouse.
Triangle: Polygon Tool reduce the sides of the polygon to three sides with the up/down arrows while holding the mouse. Drag to change scale then release mouse.
Move the shapes with the Selection Tool.
Put three of the shapes into one 4" x 4" format and the other three into the second format. You can arrange them into any order you like but the compositions must be interesting and meet the following criteria.
Within each format the shapes cannot visually float. Even if it's just at a point, they need to touch what's next to them. The shapes must touch but they cannot overlap or visually merge with each other or with the picture frame. The whole must seem as if under pressure from all sides of the frame. Against the frame or each other the shapes must keep their distinctiveness. They cannot extend beyond the frame or merge with the frame. For the shape to keep its distinctiveness even when against the side of the frame or another shape, there must be space between them and only touching at one point without merging. Tilt them if necessary. They must have the appearance of immobility and as if with a little more pressure from the frame the shapes would collapse. Make decisions about placement, orientation, scale, implied movement, and direction.
To see the objects better use the Zoom Tool
or the Scale View at the bottom left of the document window.
You can manipulate the shapes with one of the following ways.
To reshape and arrange the shapes you can use the Transformation tools available through the Selection Tool,
or select the shape and go to Object > Transform > and chose a tool,
or use the Transformation Tools available in the Toolbox.
The Rotate Tool, The Scale Tool, The Free Transform Tool
Complete the two 4" x 4" compositions of black shapes on a white ground. Save what you have before continuing.
You will now reverse the color in the negative and positive shapes in copies of the first two designs.
With the Direct Selection Tool select the new black shapes one by one by direct selecting while pressing the Shift key. When all the positive shapes are selected go to the Toolbox and change the Fill and Stroke color from black to white
click on the Fill tool and go to Widow > Color, to make sure the Color Widow is open.
in the color window select the small white square in the bottom right,
notice that the arrow cursor changes to a small dropper.
click on the Stroke tool and change the color to white by selecting the small white square
in the bottom right of the color window.
Chose the Direct Selection Tool and select the background shape in the square format and change the color to black by selecting the small black square in the bottom right of the color window. Click outside the objects and deselect all.
If there is no background shape when you Direct Select inside one of the design squares you can make one and place it behind the shape by going to Object > Arrange > Send to Back and aligning it.
Visually verify that all the designs meet the assignment criteria. Pay particular attention to the role of the Stroke in changing the relationship between shapes and with the frame.
F10tross

F10HWarren
F10benham

U10Roman

U10Dupre
U10Boonstra
S10mathys
S10Luna
F08vhyde

F08SLopez
F08sgorecki

F08RBailey2
F08RBailey
F08pbaker
F08imorrison2
F08imorrison1
F08etorres
F08Edkang
F08dybala
F08dEscamilla
F08caruso
F08Aizquierdo
F08agrove
F07olson
F07mvoss
F07Jabari
F07gonzalez
F07EWeartz
F07EWeartz2
F07baguirre
S07MKennihan
xx3
xx2
xx1
Shapes
Images