Jose Agustin Andreu
STUDENTS' WORK
2 Dimensional Design
Page 2
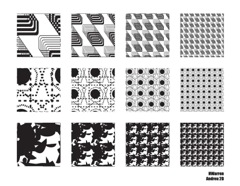
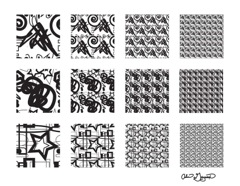
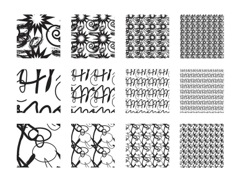
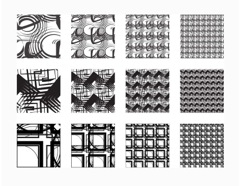
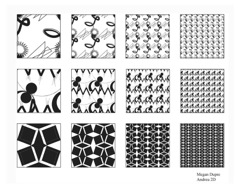
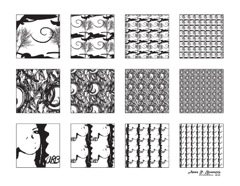
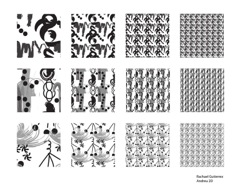
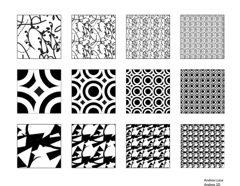
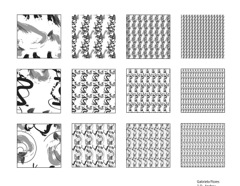
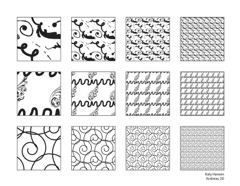
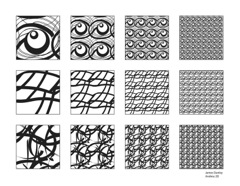
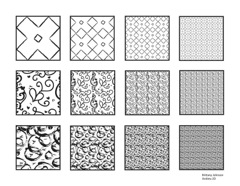
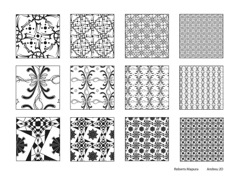
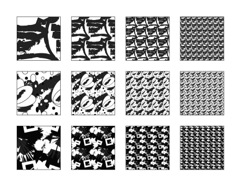
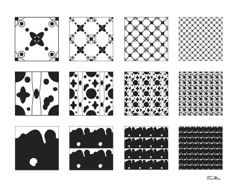
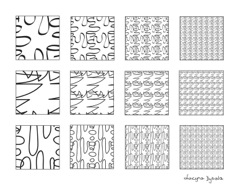
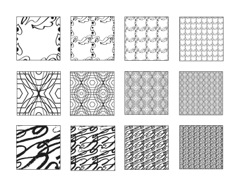
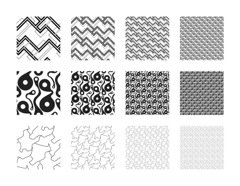
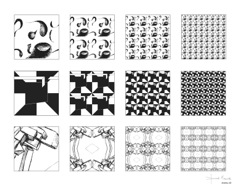
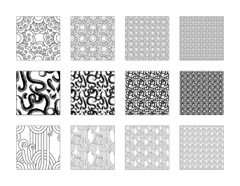
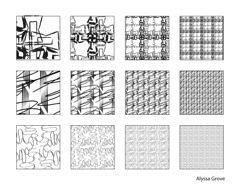
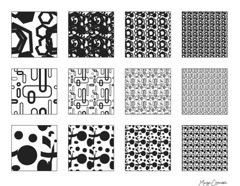
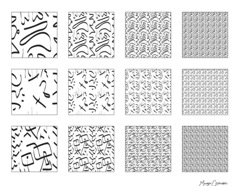
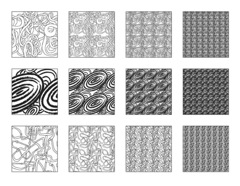
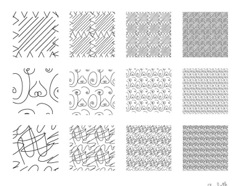
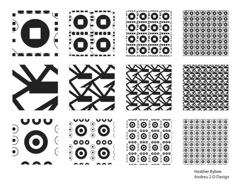
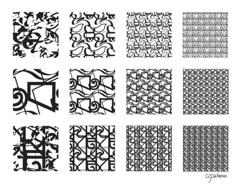
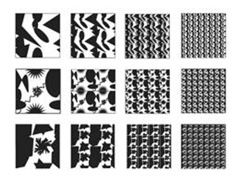
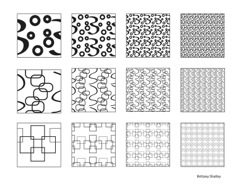
Tessellations 3 x 4
Click Image for Manual Slides
F10HWarren
F10gingerich
F10dkim
Create three Tessellated patterns with three 50% reductions from each and save all twelve Unit Cells as Swatches.
In the Toolbox window select the Rectangular Tool
The Info window indicates the coordinates of the cursor, X is horizontal & Y is vertical,
on the Artboard and the size, W is width & H is height, of the drawn shape.
Draw a 2" x 2" square and hold the shift key before releasing the mouse. It will constrain the rectangle to a square.
While still selected, make the 2" x 2" square's Fill None and the Stroke Black. This will be Unit Cell's bounding square.
go to View > Snap to Grid and Deselect Snap to Grid.
On the left side of the bounding square, draw textured shapes and lines that intersect the edge.
go to View > Snap to Grid and Select Snap to Grid.
Then Drag Copy the textured edge and square.
With the Direct Selection tool, select the textured edge and the square.
Drag the rectangle to the right; then press Option + Shift to create a copy and to constrain the move.
When the upper left corner point of the copy snaps to the upper right corner point of the bounding square, release the mouse button, and then release the keys.
Or
you can select only the textured edge and go to Object > Transform > Move
and specify a horizontal move, 2", the width of the rectangle. Select Preview to see how it will look.
Be sure to click Copy instead of OK in the Move dialog box.
Click outside the rectangle to deselect it. Select the right rectangle, and delete it.
go to View > Snap to Grid and Deselect Snap to Grid.
Draw a textured edge with objects or lines that intersect the top edge of the bounding square.
go to View > Snap to Grid and Select Snap to Grid.
Select all of the lines or objects crossing the top edge and the bounding square.
Drag Copy by pressing Option & Shift keys and drag downward to create a copy and to constrain the move.
When the upper left corner point of the copy snaps to the lower left corner point of the rectangle,
release the mouse button and then the keys.
Or you can select only the textured edge and go to Object > Transform > Move and specify a vertical move, the height of the rectangle. To move a copy down rather than up, write –2 in the vertical box. Select Preview to see how it will look.
Be sure to click Copy instead of OK in the Move dialog box.
Deselect everything.
Select the lower square and any objects that don't cross the top square and delete them.
Select the Pencil tool, Brush tool or the Pen tool and draw in the middle of the square.
Select a Brush Style and/or Stroke Weight for the drawn paths.
Once you have a unit cell design, Direct Select and Delete the original bounding square.
The Bounding square can also be Selected and Deleted by clicking its Radial Button on the layers palette.
Select everything.
Go to Object > Expand Appearance to access the styles imposed on the paths.
Deselect everything.
go to View > Show Grid
go to View > Snap to Grid
Draw a 2" x 2" square with Stroke black and Fill none over the design similar to the old bounding square.
Drag Select everything and go to the Pathfinder and select Crop.
You have a Unit Cell for the Tessellation.
Set it half inch from the left and half inch from the top in the Artboard.
With the unit Cell selected,
Choose Edit > Define Pattern.
Enter a name in the New Swatch dialog box, and click OK.
The pattern displays in the Swatches palette.
Or, drag the artwork to the Swatches palette.
Test the swatch by selecting it as a Fill and a Stroke and drawing a large rectangle. Delete it.
With the Rectangle Tool selected place your cursor at the top left corner of the Artboard, 0, 0,
and draw a 4" x 4 " square by dragging up, outside and up, from the Artboard.
With the pattern filled square selected, go to Object > Expand.
Then go to Object > Transform > Scale and in the Scale window select Uniform scale to 50%.
Make sure Objects in the Options panel is selected and click OK.
Go to Object > Expand again. Make sure Fill is selected in the Expand Options window.
Deselect and click the Default Fill and Stroke to the lower right of the Fill and Stroke tools.
Make the Stroke black and the Fill none. Draw a 2" x 2" square over the reduced pattern filled square.
Drag Select both, make sure all paths and points are selected, and in the Pathfinder click Crop to crop the unit cell again.
Set the second Unit Cell a half-inch to the right of the first one.
Choose Edit > Define Pattern. Enter a name in the New Swatch dialog box, and click OK.
The pattern displays in the Swatches palette.
Or, drag the artwork to the Swatches palette.
Once in the layers palette, double click on it and give it a new name.
Repeat twice more reducing the swatch 50% each time.
You now have three reduced scale swatches of the original tessellated pattern. The process can be repeated if a smaller pattern is needed. Deselect all and save the document.
Create three Tessellated patterns with three 50% reductions from each and save all twelve Unit Cells as Swatches.
Once you have all twelve Unit Cells laid out on the Artboard separated by half inch, Save the document.
Go to Swatches Options by clicking on the small triangle in the top right of the Swatches Palette and
select Save Swatch Library. Give the swatches file a name and
save it into a new folder within your folder in the dialogue window.
Now you can access the tessellations for other projects later.
U10Hirst
U10Dupre
U10Boonstra
S10RGutierrez
S10Luna
S10GFlores

F09schollmann
F09Hansen

F09Gniazdoski
F09Danley
F09BJohnson
S09RMapura

S09PLarios
F08vhyde
F08SKim
F08LDybala
F08KVanderburg
F08imorrison

F08ETorres
F08descamilla
F08AIzquierdo
F08AGrove
F07mcrouse2
F07mcrouse1
F07EWeartz
F07esimon
F07bybee
F07apeters
xxa
BHatley
Page 1 Page 2